

VM Instance (Always free)
Create VM Instance
In this example we are going to use the new “Always Free” Resources. Remember that you need your cloud account (https://docs.oracle.com/en/cloud/get-started/subscriptions-cloud/csgsg/get-oracle-com-account.html). Remember, this leave us to have 2 Autonomous Database + 2 Load Balancers + 2 VM instances (plus different Storage Options). This resource it will be unlimited for us (but remember we don’t use them for at least 7 days continuously, they will be stopped, and if we hold stopped our database for at least 90 (cumulative) , Those resources will be reclaimed and deleted PERMANENTLY). Please review that in this links: https://docs.oracle.com/en/cloud/paas/atp-cloud/atpug/autonomous-always-free.html#GUID-03F9F3E8-8A98-4792-AB9C-F0BACF02DC3E
Now we are going to create the new VM Instance. All this new steps will be done through OCI Console.
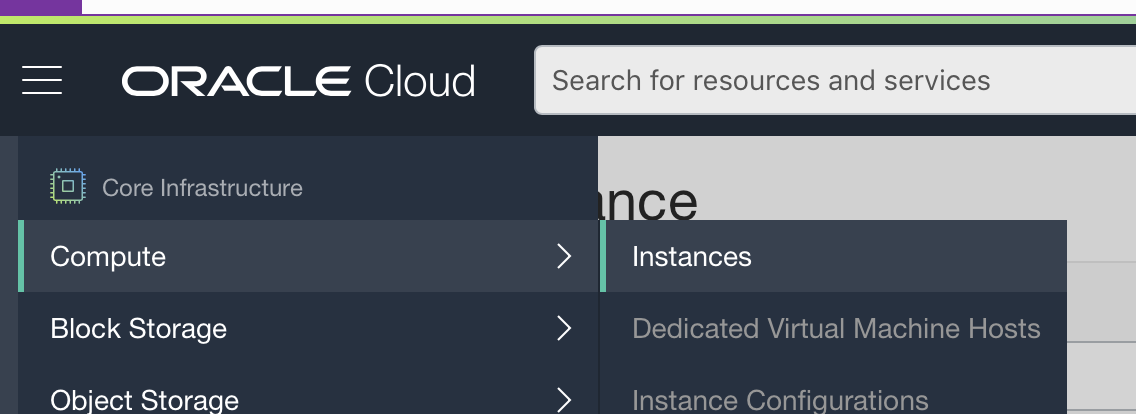
From Quick Actions Menu select:

On that screen we need to put instance’s names.

On the SSH key’s screen we’ll proceed to putt he content of our ppk file. For our case we are going to use the file /Users/felipedonoso/.ssh/id_rsa.pub. We need copy the content and paste on the ssh key screen. (you need choose Paste ssh key option ) This leave us for connect to new VM Instance with the opc user account.

After we can press the Button “Create” for create the VM Instance.

We are going to proceed to go Core Infrastructure -> Compute -> Instances, for review the new status for our new VM Instance VM_Instance_Lab_01
The new status will be this:

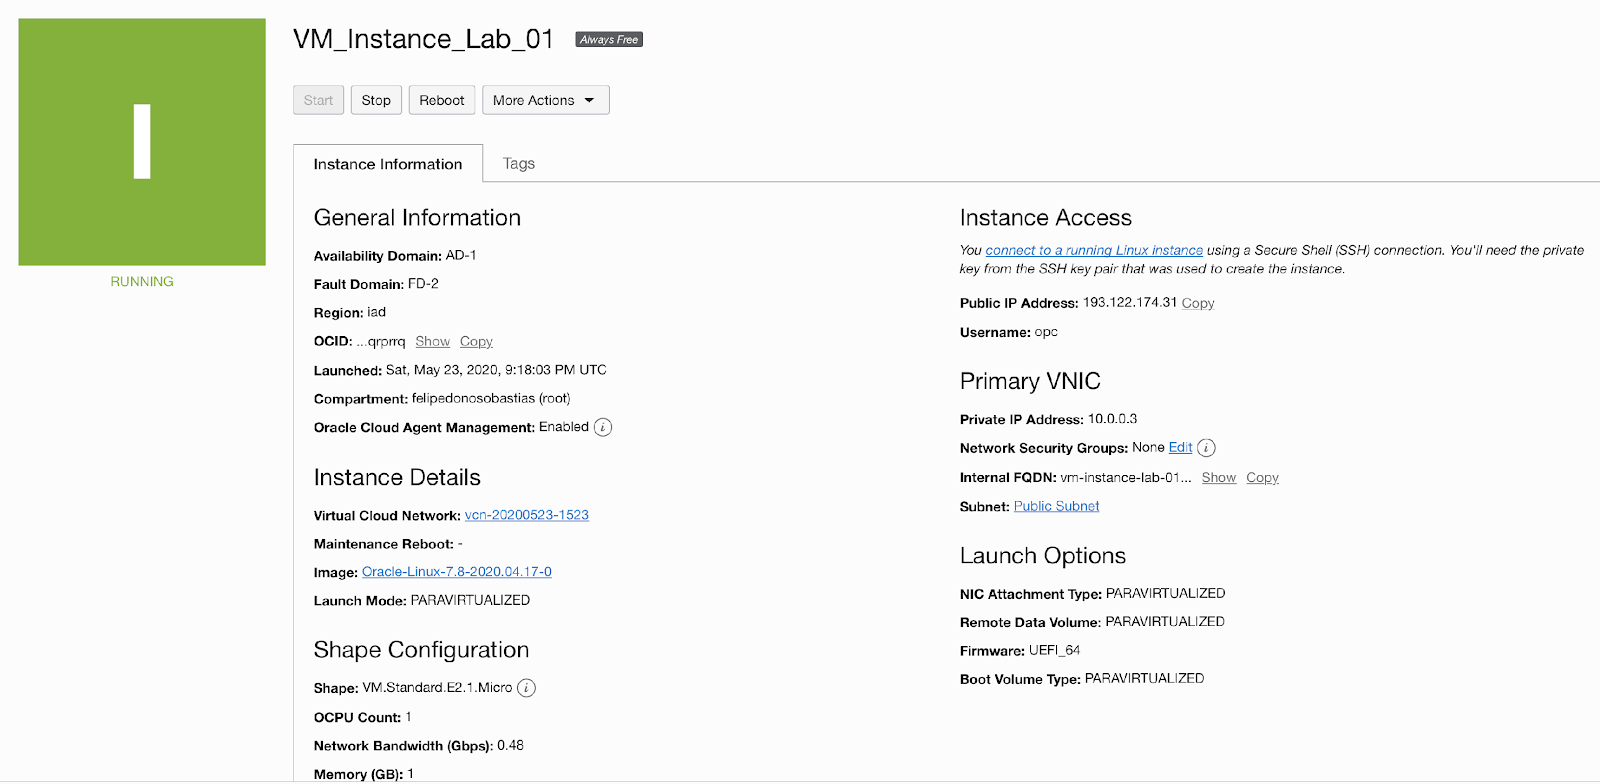
So we proceed to select Instance’s name, we can see the next one:
Accessing the new VM Instance with ssh
For to test access to this new VM instance we need to copy the public ip.
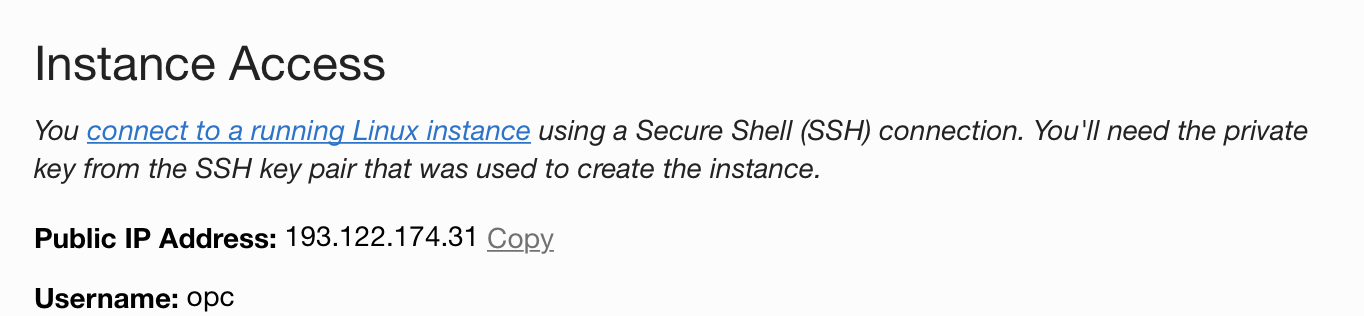
And we need to connect that ip with the private key using the username opc
felipe@localhost: ssh -i id_rsa opc@193.122.174.31
The authenticity of host '193.122.174.31 (193.122.174.31)' can't be established.
ECDSA key fingerprint is SHA256:iU5hkeWpSOymOT8zxyzfF1WSY45hNIhaM3AVKWPcq44.
Are you sure you want to continue connecting (yes/no)? yes
Warning: Permanently added '193.122.174.31' (ECDSA) to the list of known hosts.
Last failed login: Sat May 23 21:55:04 GMT 2020 on ttyS0
-bash: warning: setlocale: LC_CTYPE: cannot change locale (UTF-8): No such file or directory
[opc@vm-instance-lab-01 ~]$
[opc@vm-instance-lab-01 ~]$
Indeed we can convert to root user:
[opc@vm-instance-lab-01 ~]$ sudo su -
Last failed login: Sat May 23 21:55:18 GMT 2020 on ttyS0
There was 1 failed login attempt since the last successful login.
[root@vm-instance-lab-01 ~]#
Accessing the new VM Instance with serial connection
It can be very useful in various situations use serial connections. For example for reboot VM or change something from Init Loader, or for instance review something on the console when reboot the VM, etc.. Remember that you can connect to serial console one connection at a time. For configure that we need to go Console Connections. This is on the botton of the current page.

We need to press “Create console connections”

On the SSH key’s screen we’ll proceed to putt he content of our ppk file. For our case we are going to use the file /Users/felipedonoso/.ssh/id_rsa.pub. We need copy the content and paste on the ssh key screen. (you need choose Paste ssh key option )
After that press the button Create Console Connection:

After we can see the new row with the Active status:

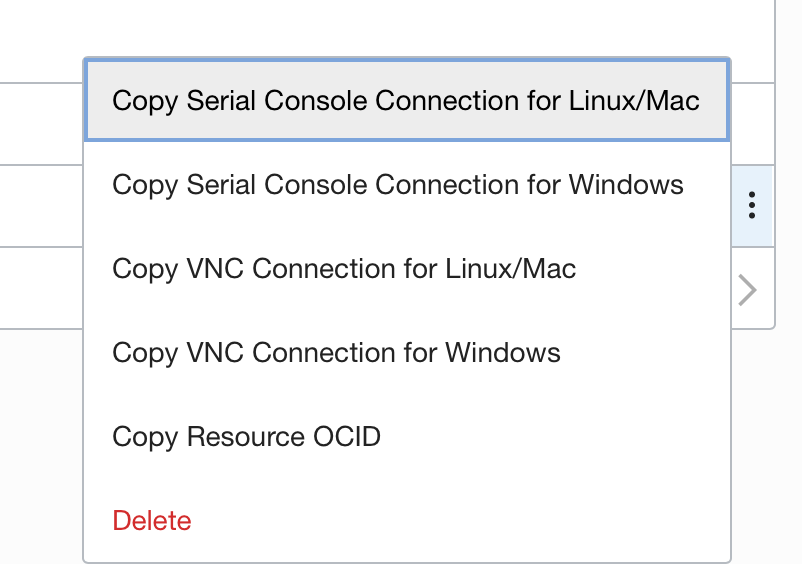
Now, we need the copy the command for the access to this Virtual Machine. So, we proceed to do click on the tree verticals icon.

So we can select the option for Linux/Mac, and that will copy the content to our buffer.
The buffer’s content show us the next:
ssh -o ProxyCommand='ssh -W %h:%p -p 443 ocid1.instanceconsoleconnection.oc1.iad.anuwcljtnjjwnoqcopfsqn6e2vedjqlwdnjmm2hoaxw3ccah64znczhsmq3q@instance-console.us-ashburn-1.oraclecloud.com' ocid1.instance.oc1.iad.anuwcljtnjjwnoqcmmjqmmaj2pu3v5wem37ke65gynsbksnm3qwrtxqrprrq
So we can paste that on our command console (in my case is iTerm) and we can see the console for the OS. Indeed, that console ask our credentials and pass.

For this example I’m going to reboot this VM from OCI Console and the last console should watch for us the reboot message.

At the moment of reboot we can see the log of the console for our reboot.

I hope this it will be help for your.
Best regards.
Felipe.

No comments:
Post a Comment